
Accessing the Campaign Manager
Navigate to Marketing → Broadcast in the left sidebar. The page title reads Campaign Manager. From any page in the backoffice you can also click New Campaign on the Broadcast History page, or use the floating Campaign Manager window that can be launched from supported shipment views.Choosing a Channel
At the top of the composer, select the channel you want to use:Sends a fully formatted HTML email. Supports rich text, images, and personalization variables. Open-rate tracking is available for email campaigns.
Sends a plain-text message via WhatsApp. Use
*asterisks* for bold text. No HTML or images are supported.Push Notification
Sends a mobile push notification to customers who have the app installed. Supports a title, short body, an optional image URL, and an optional deep-link route.
Composing Your Message
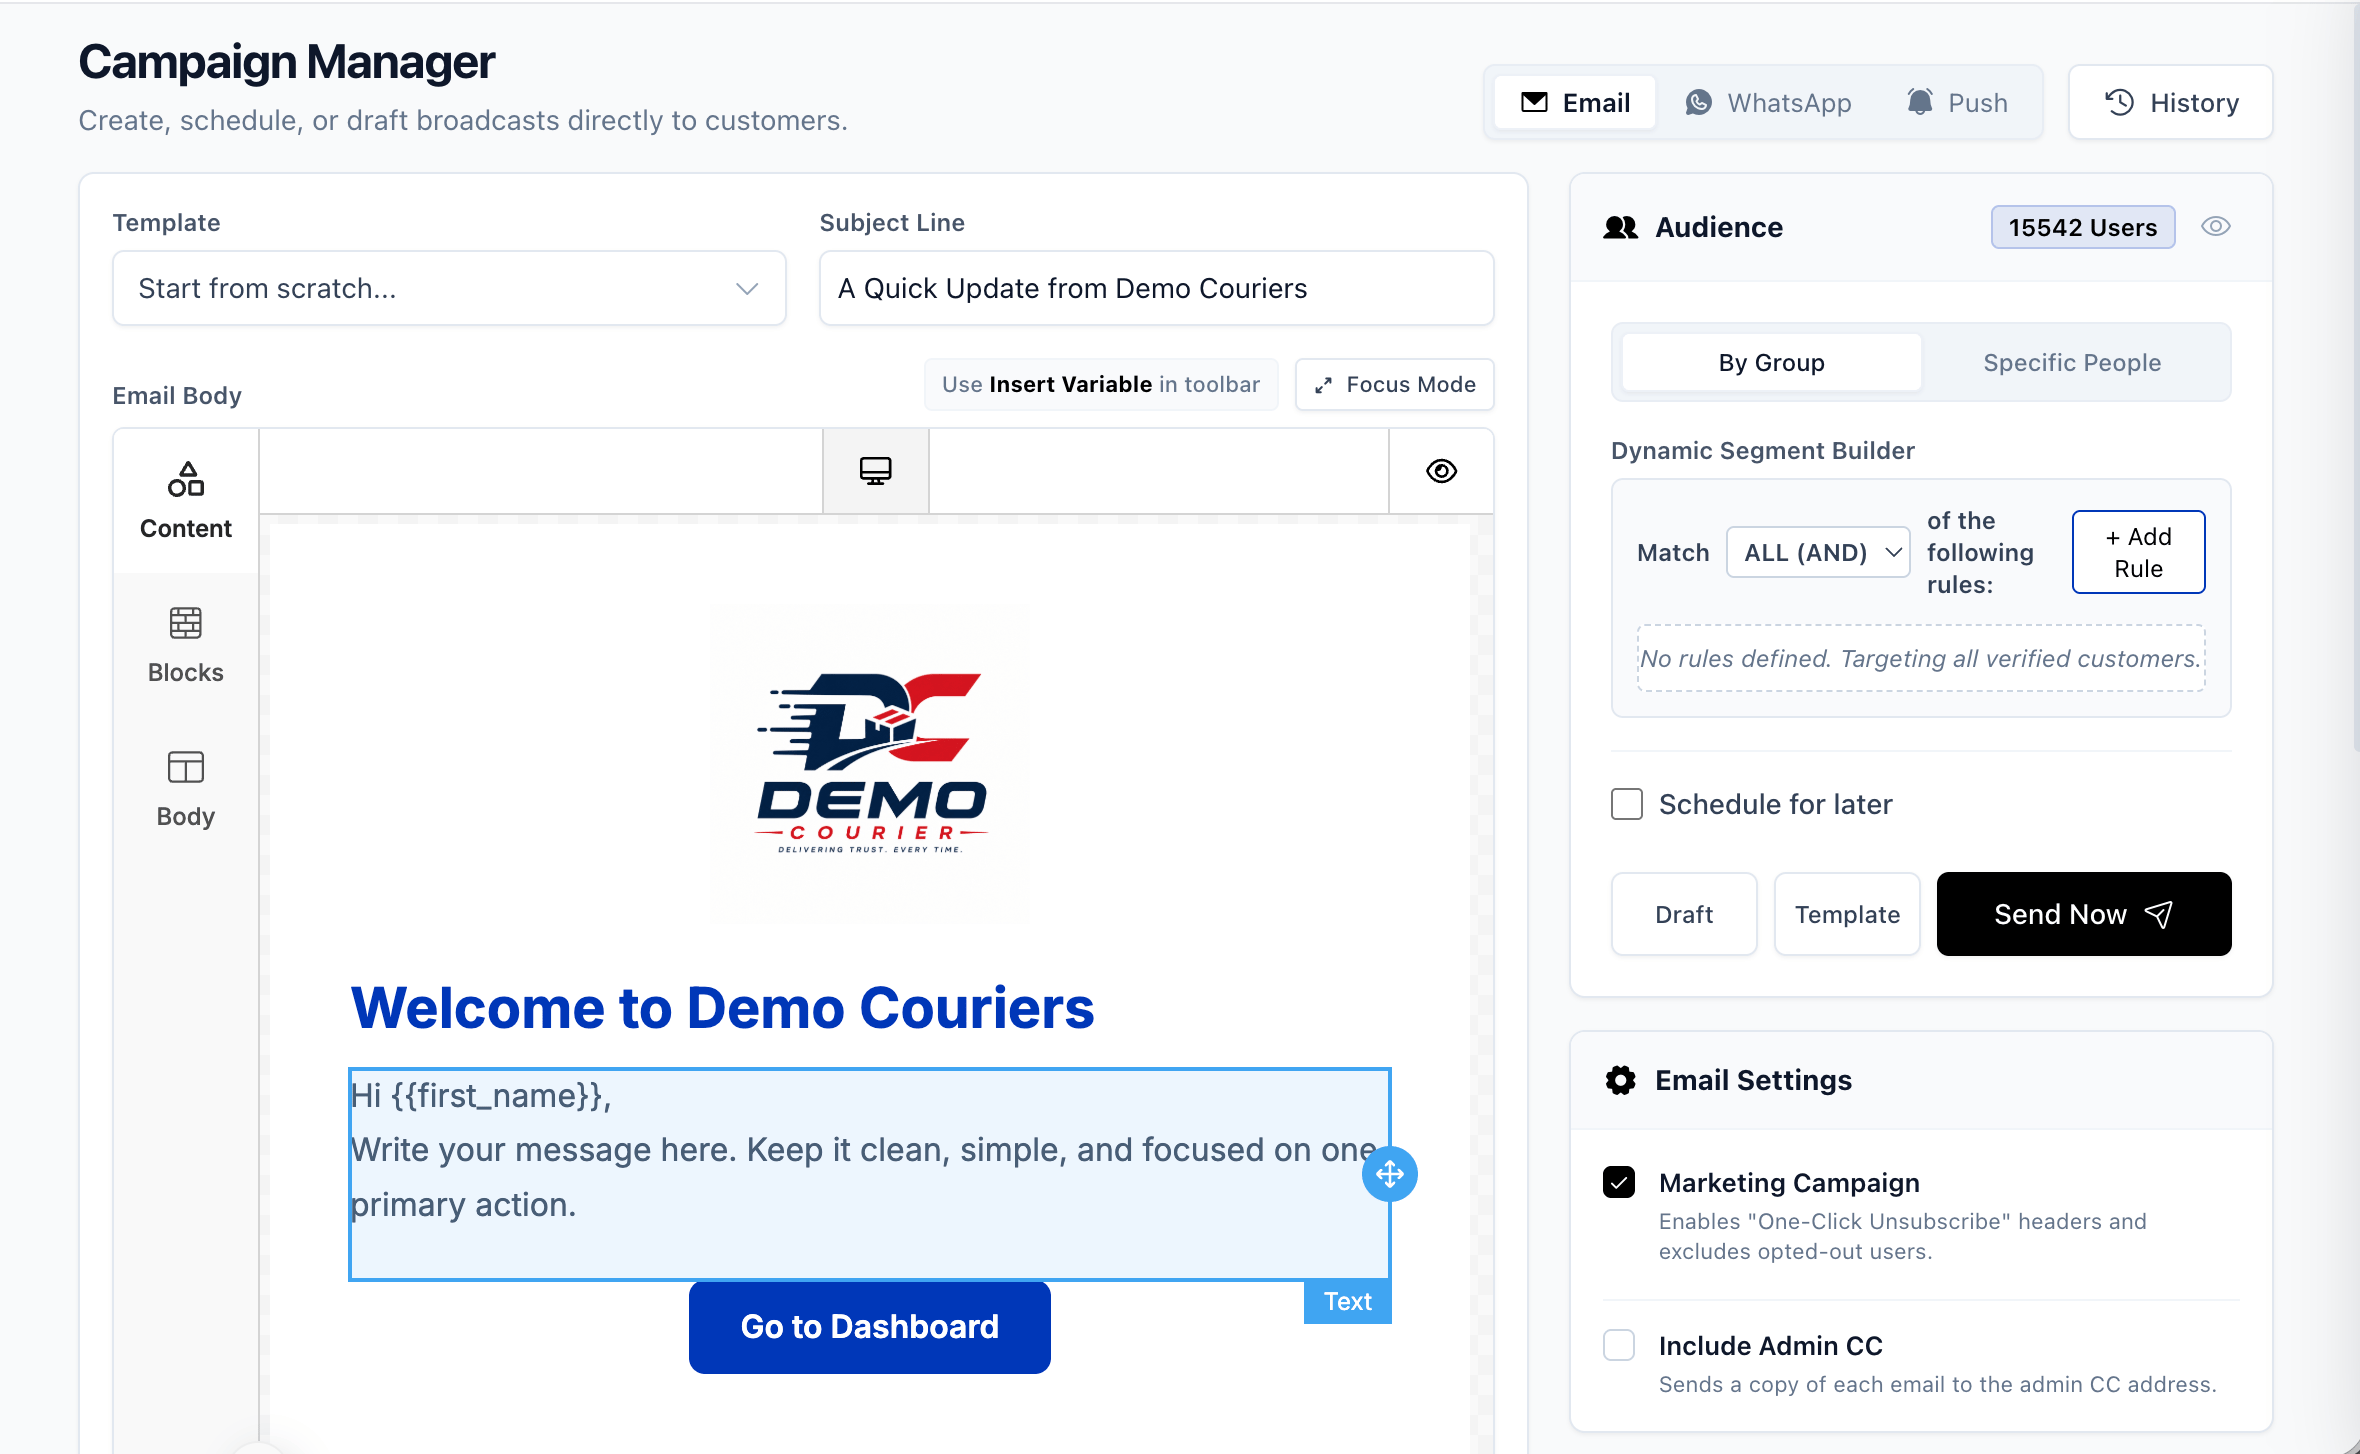
1
Select a template (optional)
Choose a pre-built template from the Template dropdown to pre-fill the subject and body. Select Start from scratch… to begin with a blank canvas.
2
Write the subject line
Enter a concise, descriptive subject in the Subject Line field. This is the first thing recipients see in their inbox — aim for under 60 characters.
3
Mark as a marketing campaign if applicable
Tick Marketing Campaign if this message is promotional rather than transactional. This automatically adds a one-click unsubscribe link and excludes customers who have opted out of marketing.
4
Write the email body
Use the rich text editor to compose your message. The toolbar gives you access to headings, bold, italic, bullet lists, links, and images. To insert a personalization variable, click Insert Variable in the toolbar and choose from the menu.
*bold*). Click any variable chip below the content box to insert it at the cursor position.
Push Notification
Fill in the Notification Title (shown in bold on the device), the Notification Body (keep it to one or two short sentences), and optionally an Image URL and a Deep Link / Route (e.g./dashboard) that opens a specific screen in the app when the user taps the notification.
Personalization Variables
Insert dynamic variables to address each customer by name or reference their account. The following variables are available across all channels:
For email, use the Insert Variable toolbar button. For WhatsApp and push notifications, click the labelled chip buttons displayed below the content area.
Selecting Recipients
The Audience panel on the right side of the page controls who receives your broadcast. A live recipient count updates as you change your selection.- By Group
- Specific People
Select By Group and choose a segment from the dropdown: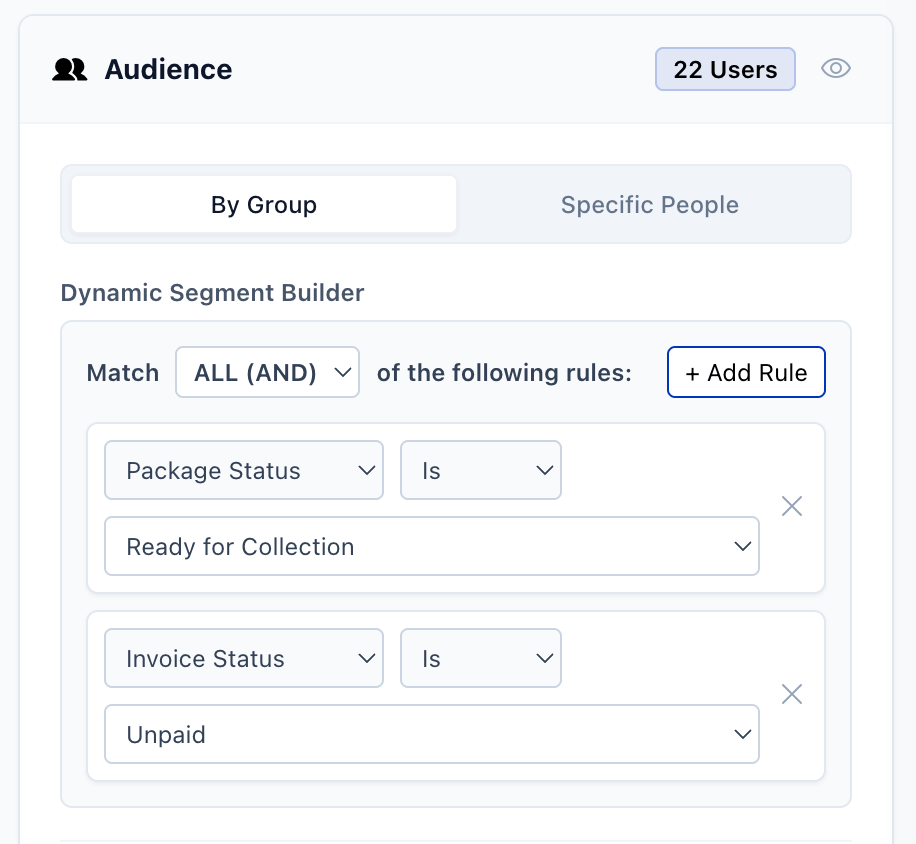
Click the eye icon next to the recipient count to preview the list of matching customers before you send.
Previewing the Message
A Live Preview panel on the right side of the page shows how your message will appear to recipients as you type:- Email — renders in a sandboxed iframe using the same styles that recipients will see.
- WhatsApp — displays a simulated WhatsApp chat bubble.
- Push notification — shows a realistic device notification card.
Saving as a Draft
If your message is not ready to send, save it so you can return later.1
Click Draft
Click the Draft button at the bottom of the Audience panel. The campaign is saved immediately with its current subject, content, channel, and audience settings.
2
Return to your draft
Your saved drafts appear in the Saved Drafts panel below the Live Preview. Click any draft to reload it into the composer. You will be asked to confirm before the current composer contents are replaced.
Scheduling a Broadcast
1
Enable scheduling
In the Audience panel, tick Schedule for later.
2
Set the date and time
Use the date-and-time picker that appears to choose when the broadcast should go out. Times are interpreted in the server’s configured timezone.
3
Click Schedule
Click the Schedule button. The campaign is queued and will be dispatched automatically at the specified time. You can view and cancel it from the Broadcast History page until it fires.
The Schedule button only becomes active once you have selected a date and time. If the date picker is blank, the button remains disabled.
Sending Immediately
1
Confirm your audience
Check the recipient count in the Audience panel. If it looks wrong, adjust your segment or individual selection.
2
Review the preview
Scroll the Live Preview panel and confirm the subject, body copy, and personalization look correct.
3
Click Send Now
Click the Send Now button. The system dispatches the broadcast to all selected recipients. You are redirected to Broadcast History when sending is complete.
Best Practices
- Subject lines — Keep email subjects under 60 characters so they display fully in most inboxes.
- WhatsApp messages — Aim for a single clear paragraph. Very long messages may be truncated on some devices.
- Push notification bodies — Two sentences or fewer. The device will cut off longer text with an ellipsis.
- Marketing flag — Always tick Marketing Campaign for promotional sends (offers, newsletters, announcements). Leave it unticked only for transactional or operational messages (e.g. shipment updates).
- Test with a small audience first — Use Specific People to send a test to yourself or a colleague before broadcasting to your full customer base.